Destiny 2: My Complete Guide to Unlocking the Microcosm Exotic Heavy Trace Rifle in 2026
Unlock the game-changing Microcosm, Destiny 2's first Exotic Heavy Trace Rifle, with this essential guide. Discover the crucial post-campaign questline and master the challenging steps to claim this meta-defining weapon for your PvE arsenal.
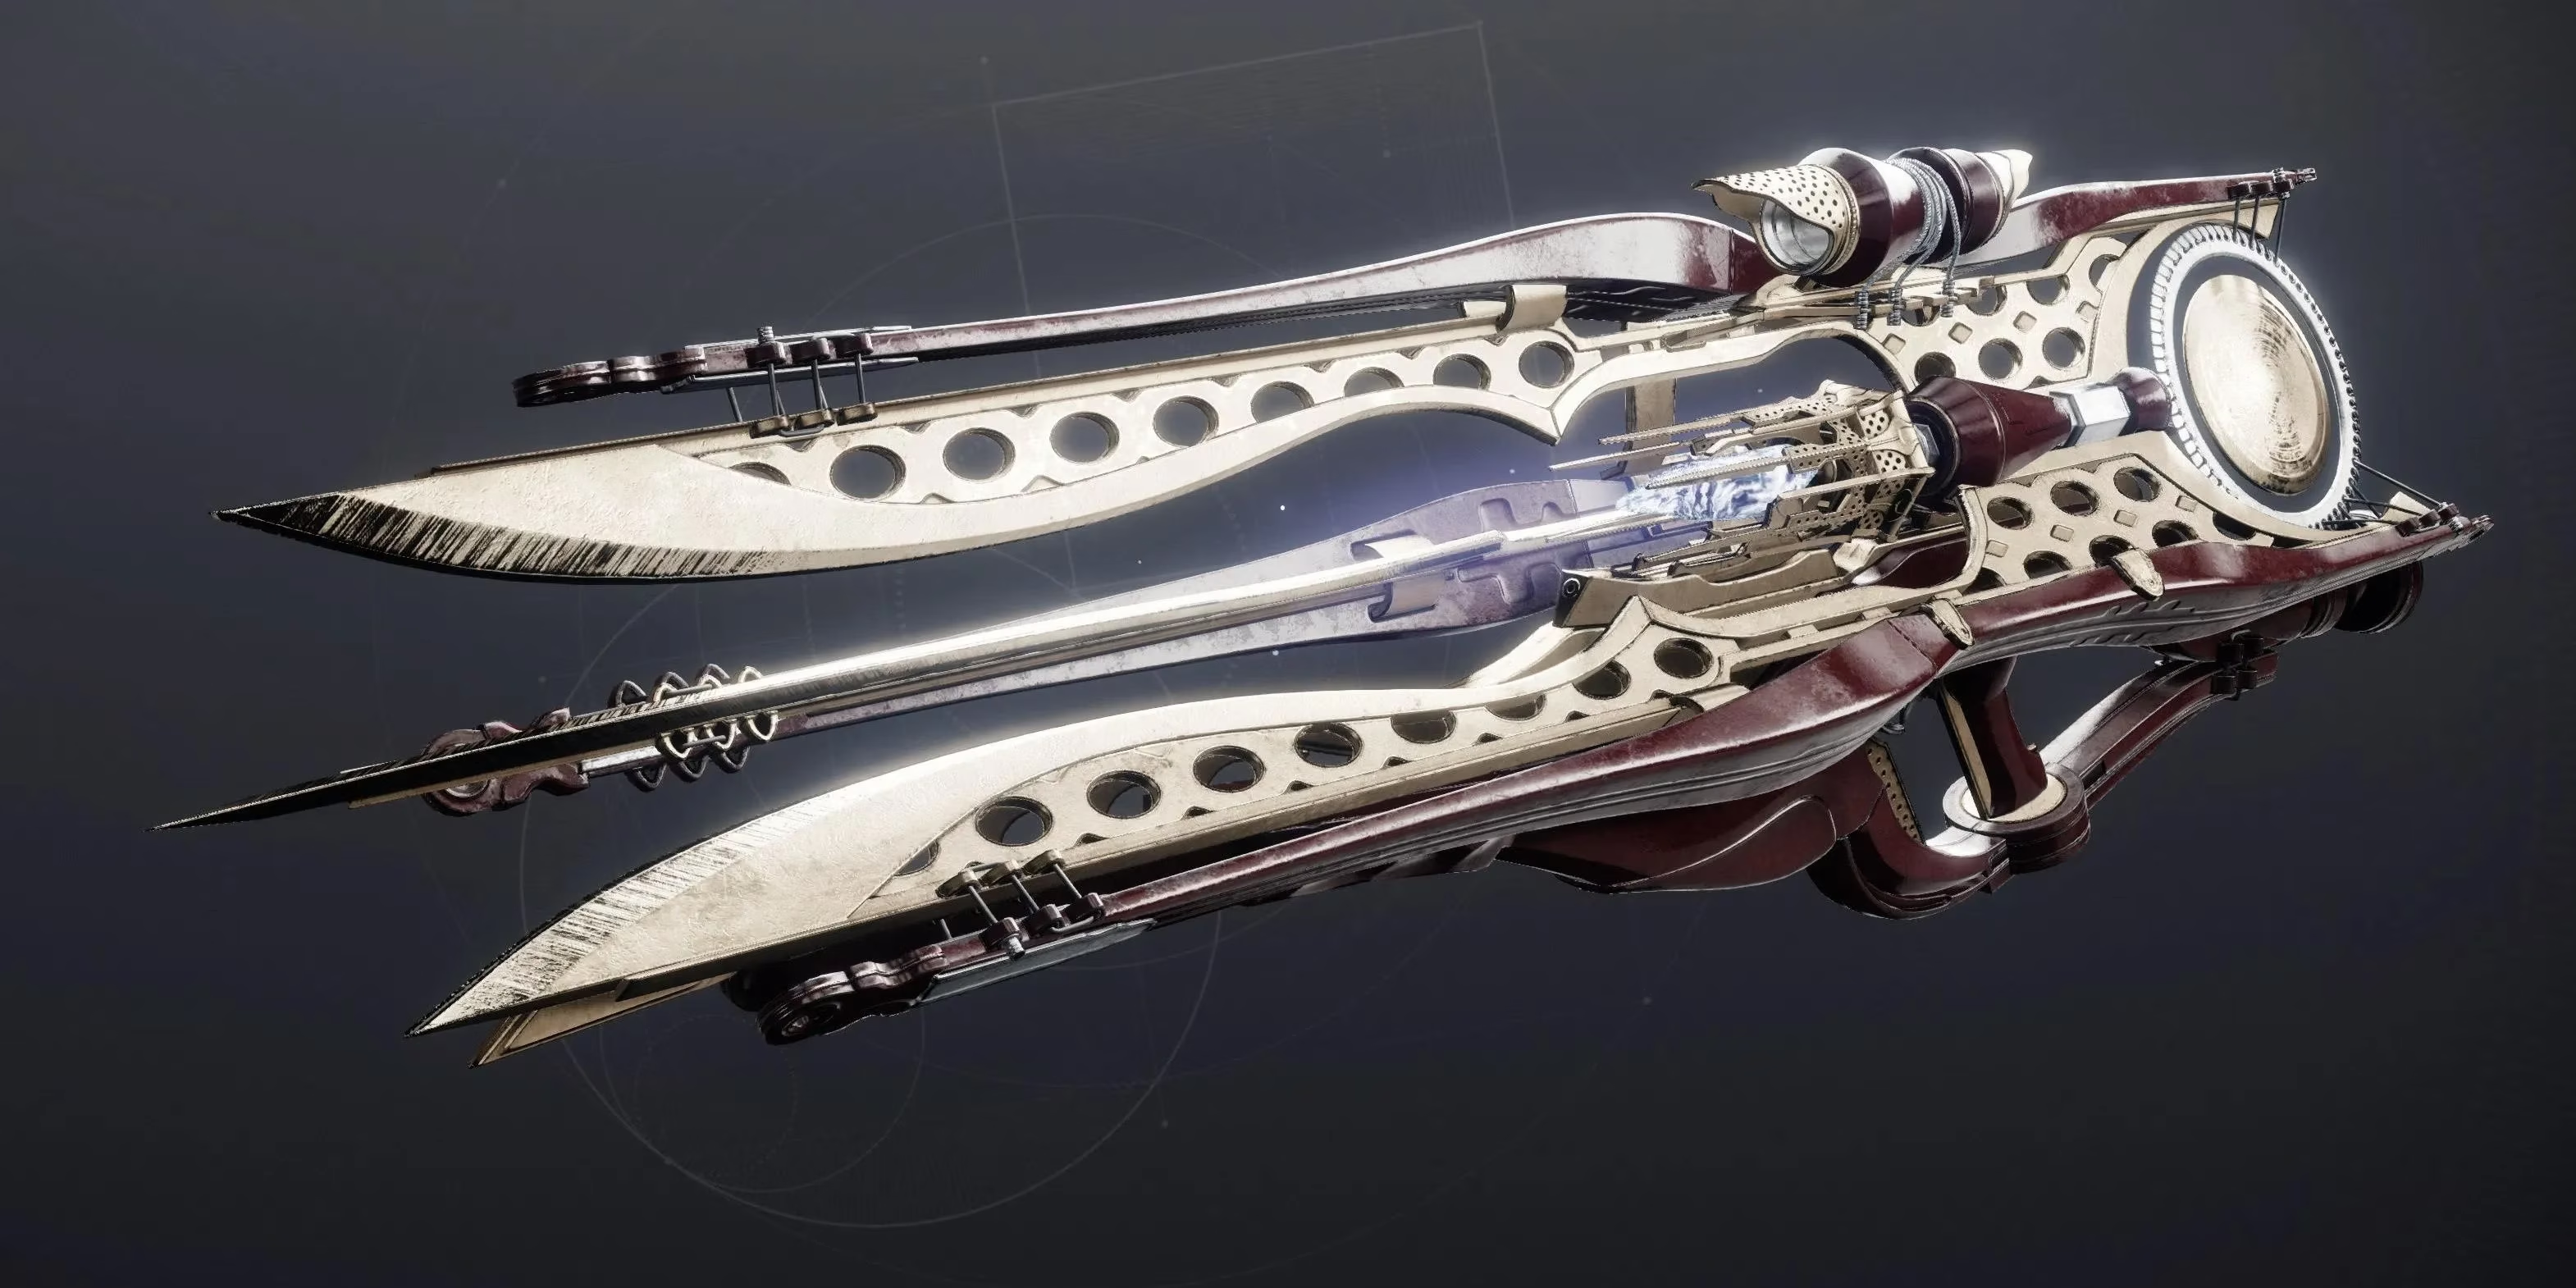
Hey Guardians! 👋 Ever since The Final Shape dropped, I've been obsessed with tracking down every new piece of gear. But let me tell you, one weapon stood out as a total game-changer, especially for my PvE loadouts. I'm talking about the Microcosm, the first-ever Exotic Heavy Trace Rifle. This thing isn't just a fancy new toy; it has the raw potential to shift the entire meta. Think about it – a heavy weapon that can melt through waves of adds and build devastating damage over time? Sign me up! But getting your hands on this beauty isn't a walk in the park. It's a journey that starts after the main campaign and takes you through some of the most challenging and rewarding post-game content. Ready to embark on the quest? Let's dive into my step-by-step guide to claiming your very own Microcosm.
🏁 Step 1: The Quest Begins
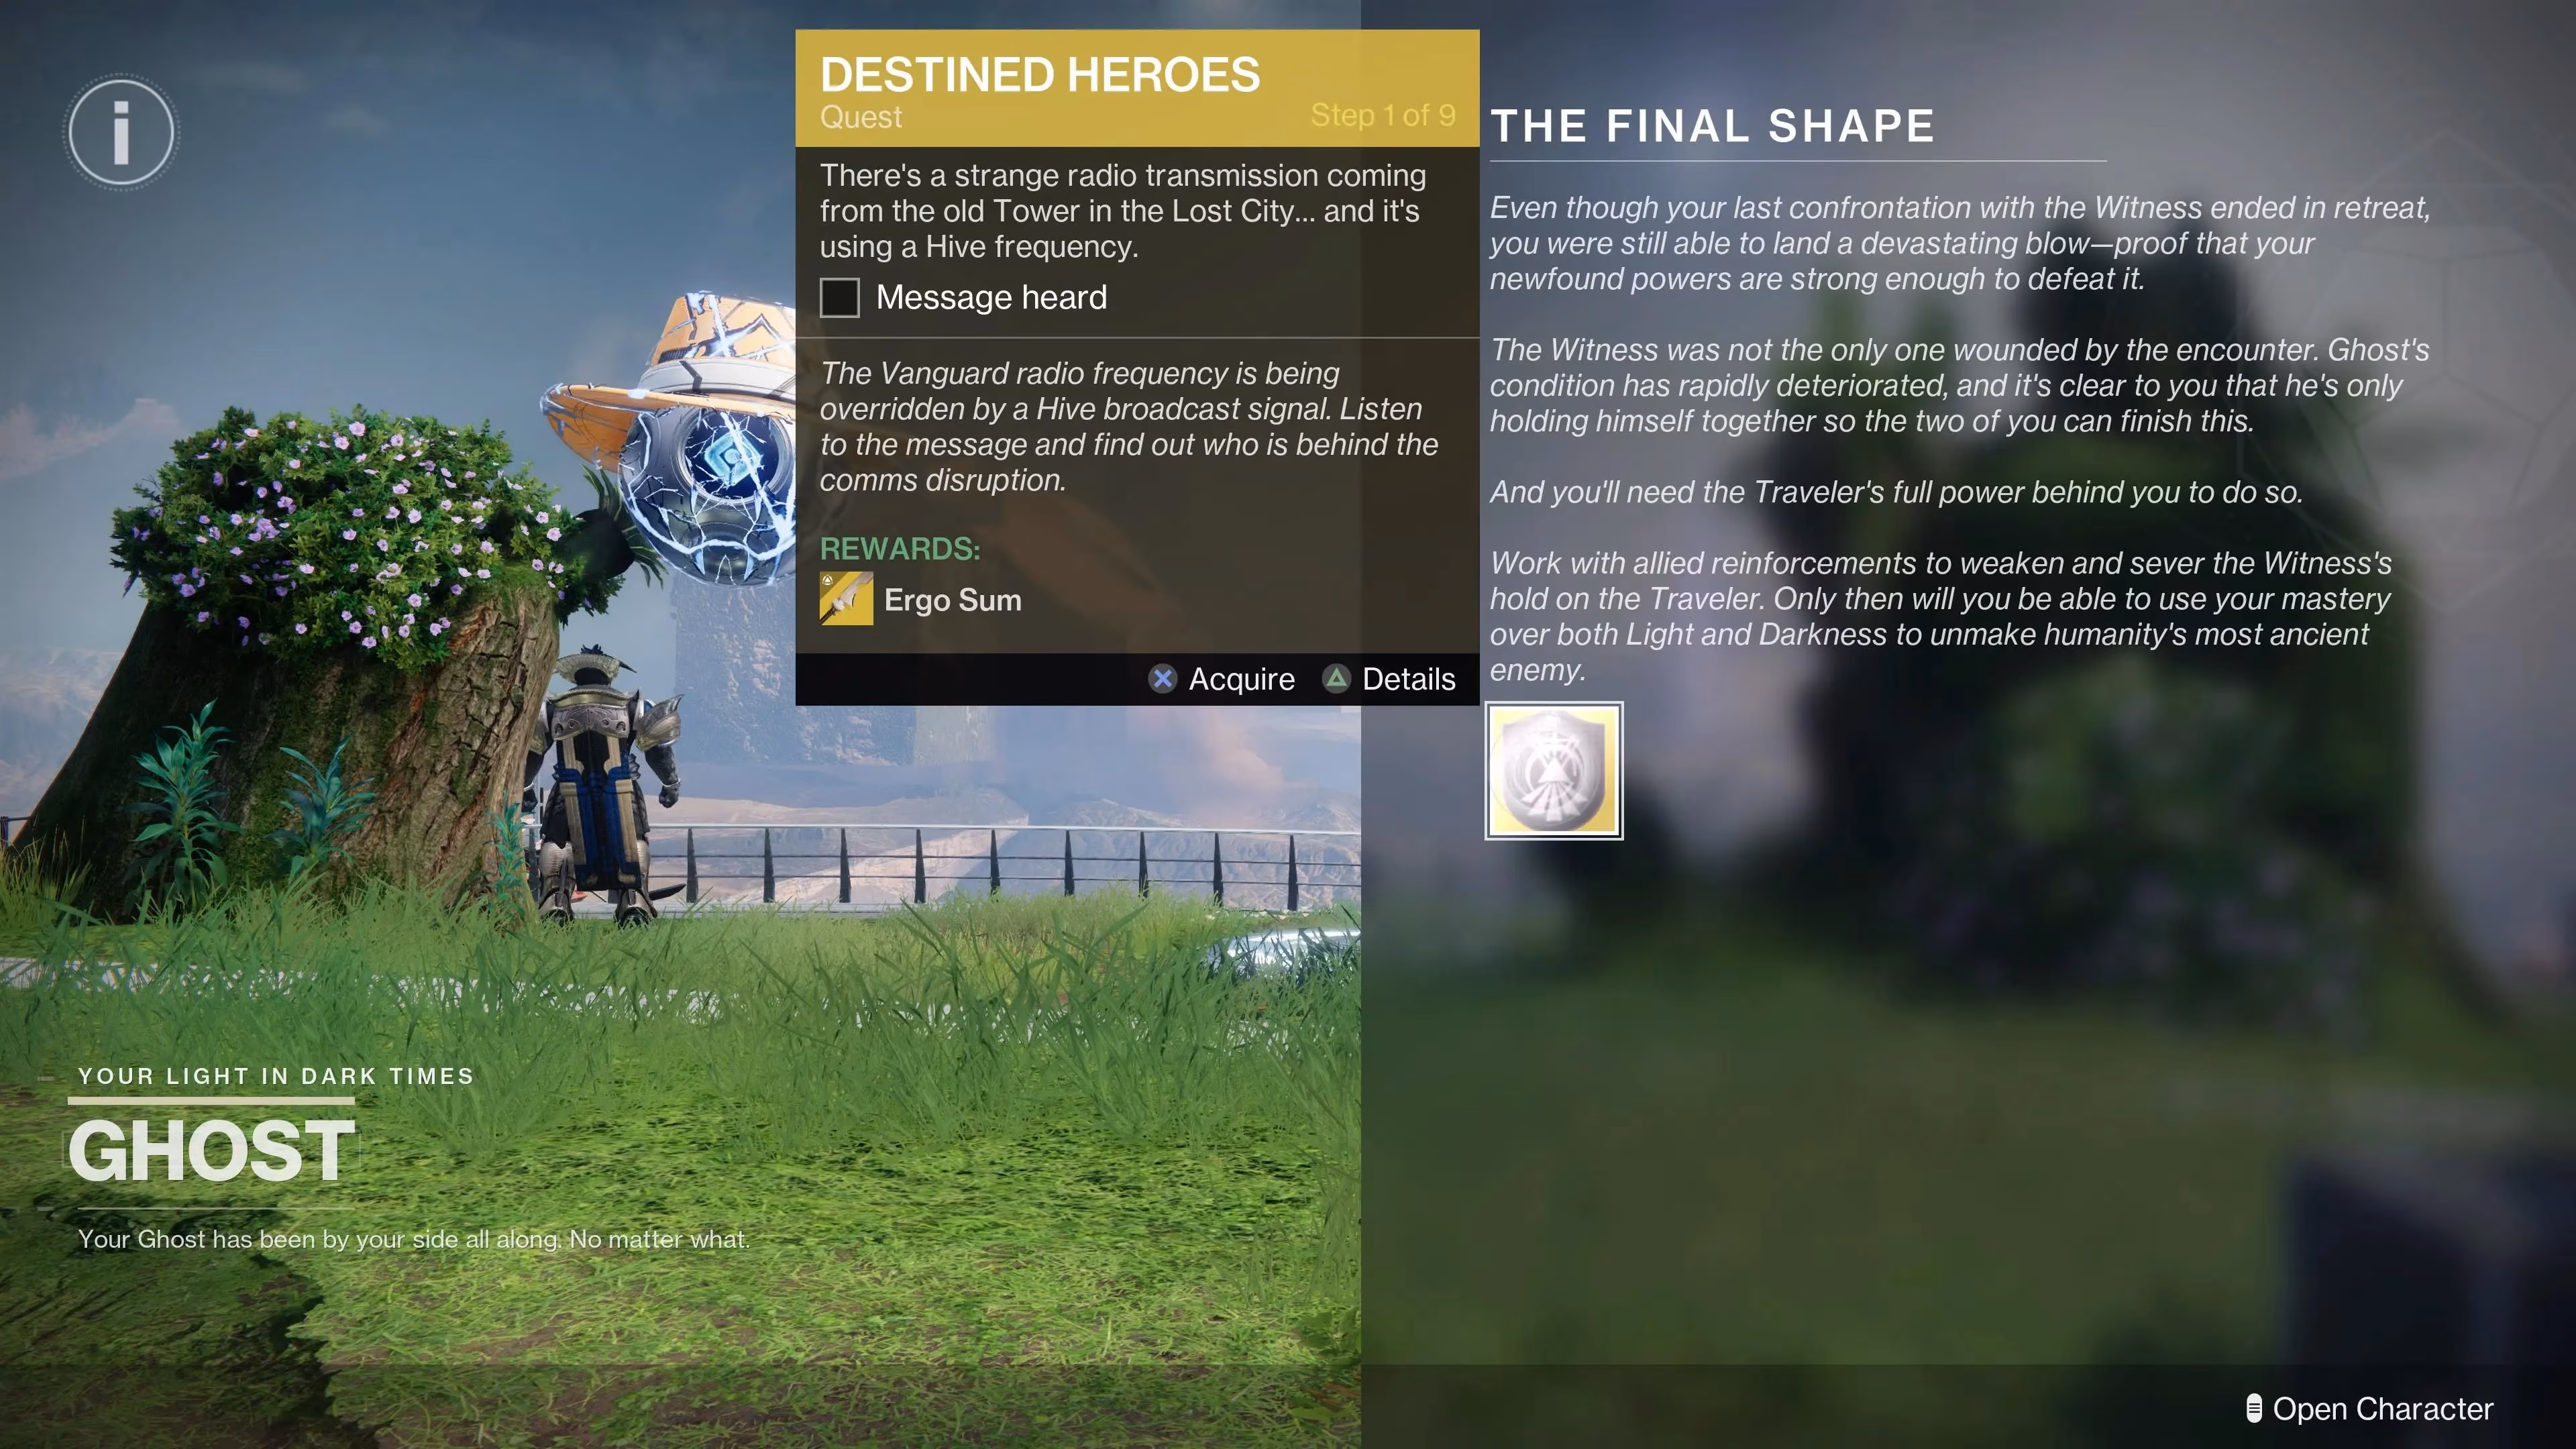
First things first, you need to have completed The Final Shape campaign. Once that's done, head to the Lost City in the Pale Heart. Your Ghost will have a new quest for you: Destined Heroes. Now, this quest is primarily for the Ergo Sum sword, but you must pick it up and progress it until you finish the 'Queens, Part 1' step. Trust me, it's a necessary detour.
After completing Queens, Part 1, return to the Vanguard table in the Lost City. Interact with the holotable, and you'll see Micah's Conduit, a Lost Ghost Analytics hologram. Approach it, and you'll receive a new Legendary Quest: Convalescence: Rootbound. This is your golden ticket! You can ignore the Destined Heroes progress for now and focus entirely on this new quest line.
🔍 Step 2: Convalescence: Rootbound - The First Ghost
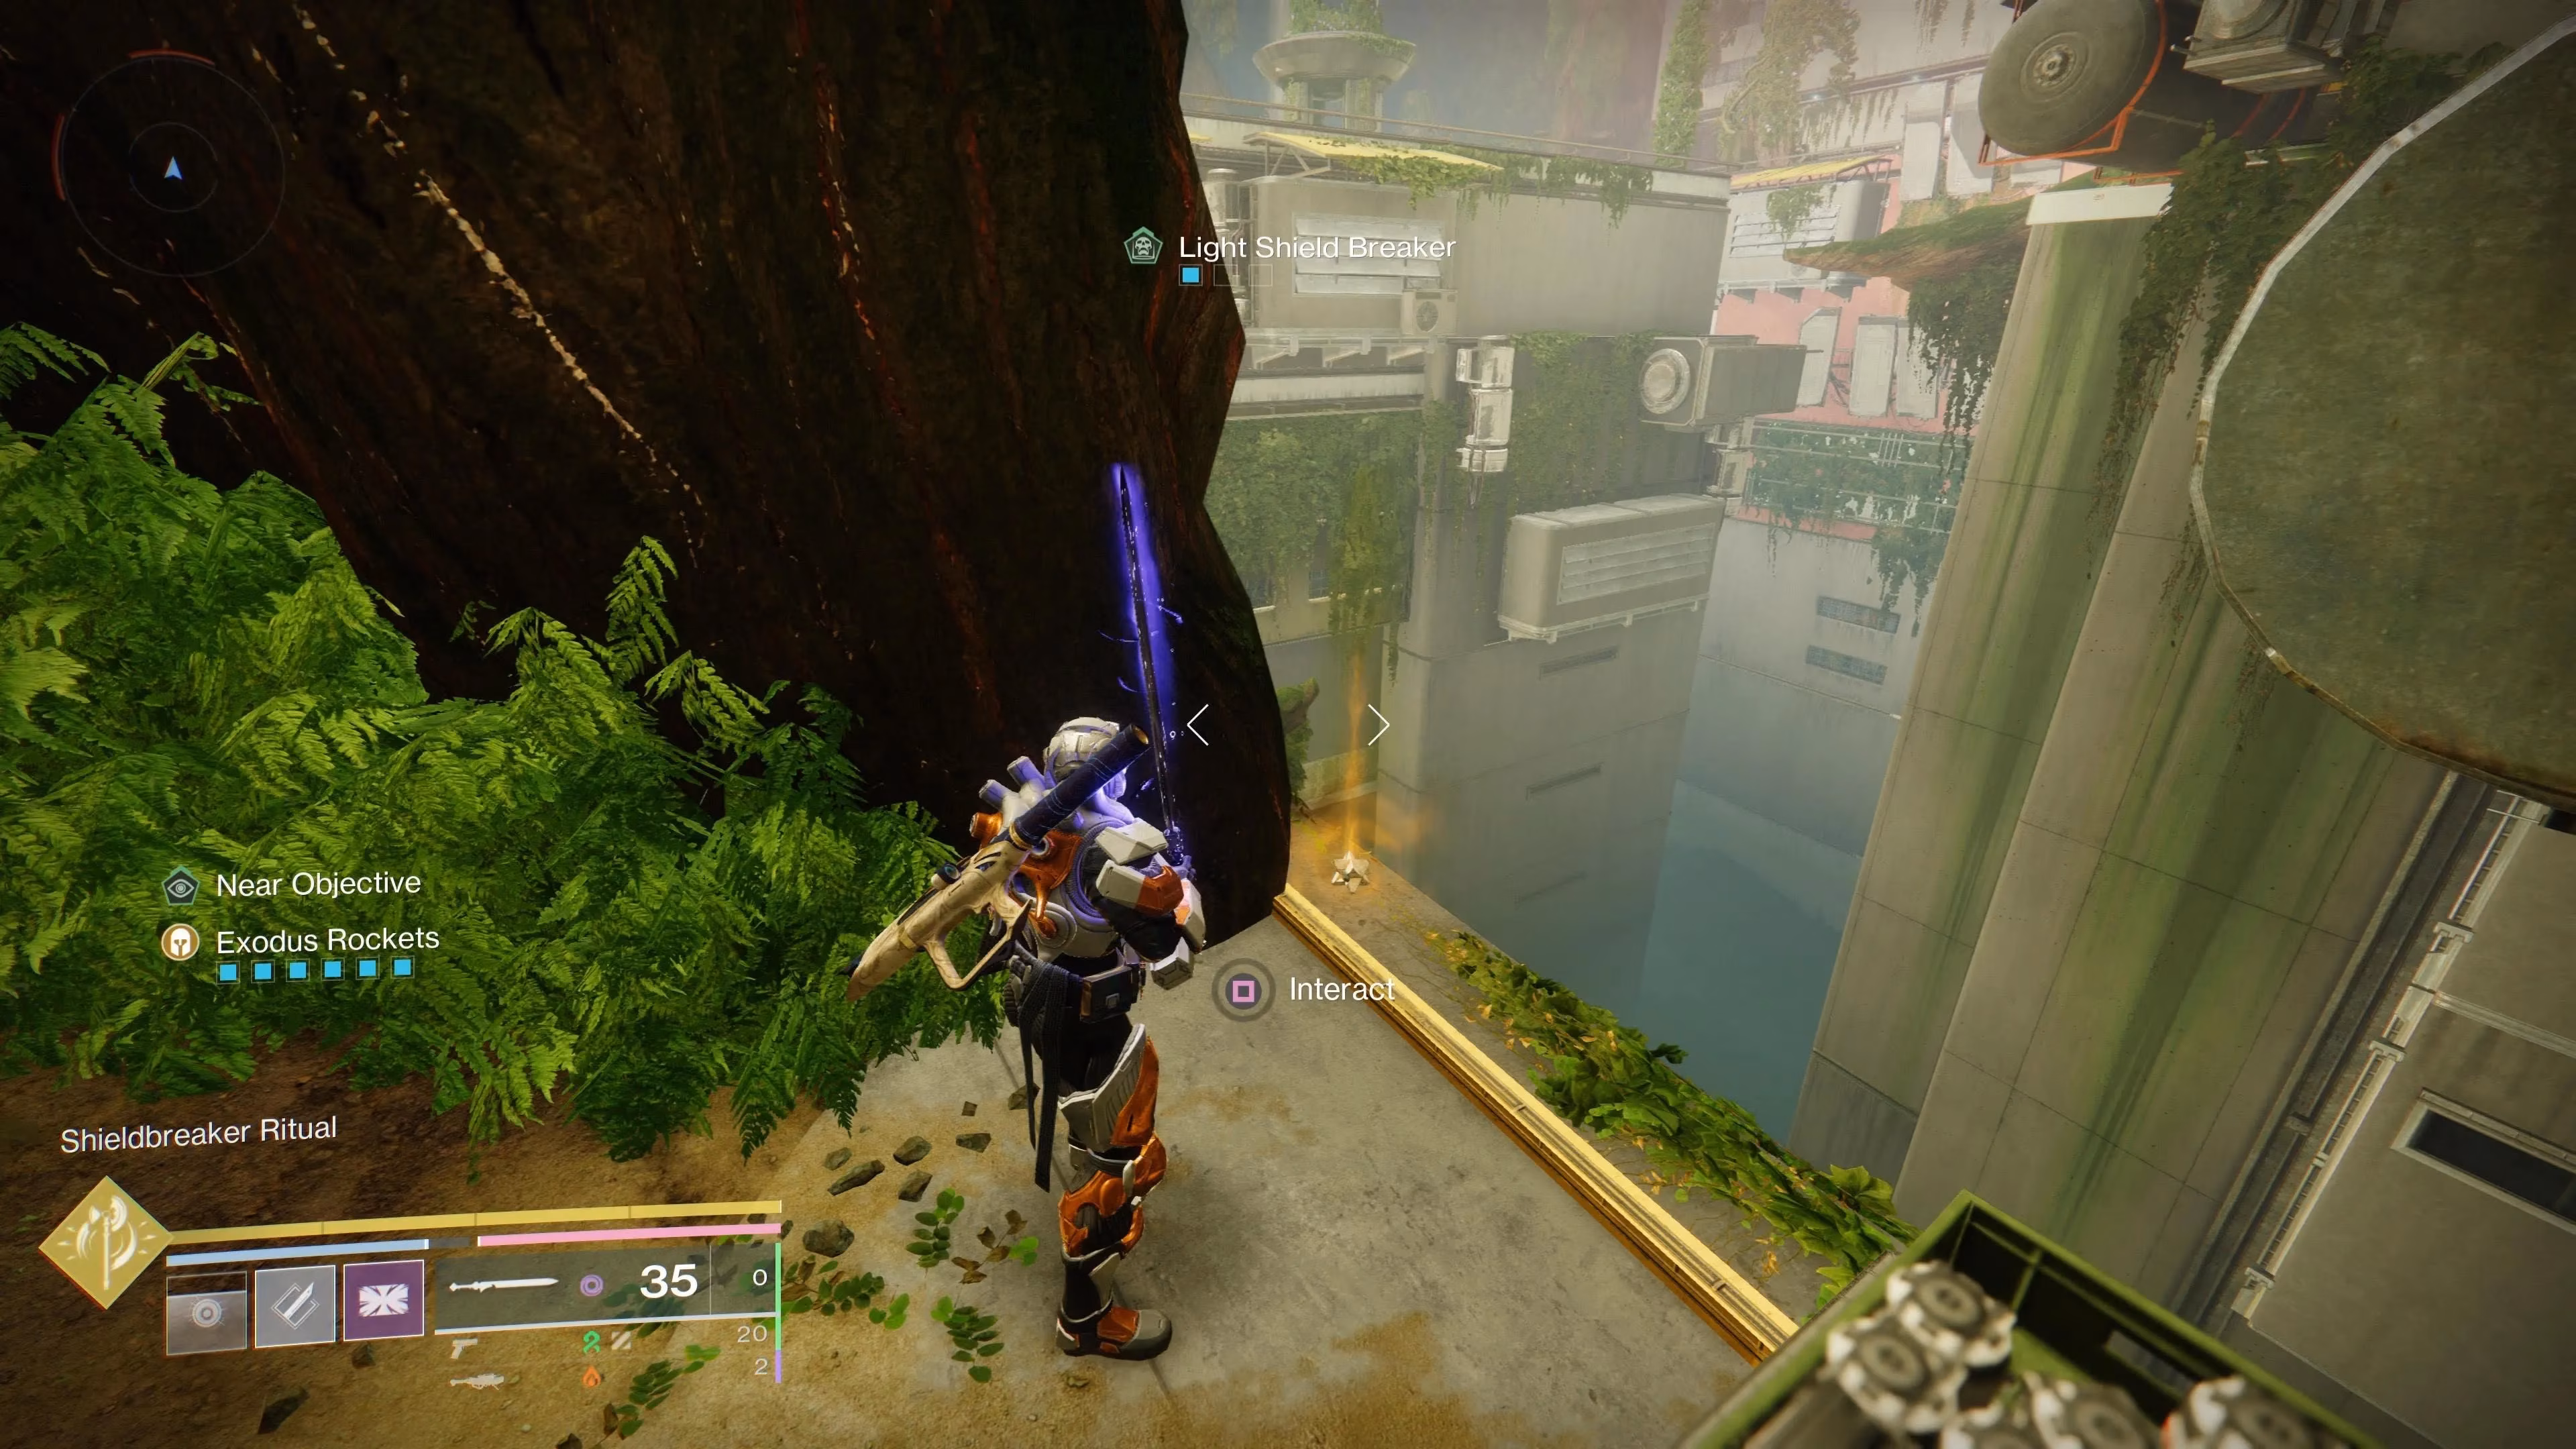
Your first objective is to find a Lost Ghost. The game marks a search area on your Pale Heart map, but I'll save you the trouble. You need to go to The Forgotten Deep Lost Sector, south of The Landing. Remember this place from the campaign? Good, because you're heading back in.
Clear the Lost Sector as usual, but here's the trick: you need to stand in three green Hive lights to build a Light Shield Breaker stack. This lets you destroy the Hive crystal blocking your path. Once in the final boss room, ignore the boss! Instead, head to the large tree, go right, and look for an inactive Ghost Shell hanging on a ledge. Grab it!
Return to the Lost City's Vanguard room. Take a right and interact with the Ghost Shell next to the growing tree. Then, go back to Micah's Conduit. You'll get a Red Border 'Someday' Shotgun and the next quest: Convalescence: Underbrush.
🎁 Step 3: Convalescence: Underbrush - Hunt for Blessings
This step is all about mods. You need to find a Flickering Blessing mod by opening random chests in the Pale Heart. Here's how I did it efficiently:
-
Check your Destinations map for Pathfinder Objectives. Tag one to get a waypoint—these lead to combat activities that always reward a chest.
-
Equip a Tracking Mod on your Ghost Shell and just patrol the Pale Heart, opening every chest you see.
Once you have a Traveler's Blessing mod, you must equip it. Open the Pale Heart map, look above The Blooming section for the Traveler's Blessing menu, and slot it in. Remember, these are temporary mods that expire after 26 hours!
Sometimes, the quest bugs here. If Convalescence: Underbrush completes but nothing happens, just fast-travel back to the Lost City, interact with the Ghost Shell at the tree again, and then return to Micah's Conduit. You'll receive Pro Memoria (Red Border Machine Gun) and Convalescence: Greenery.
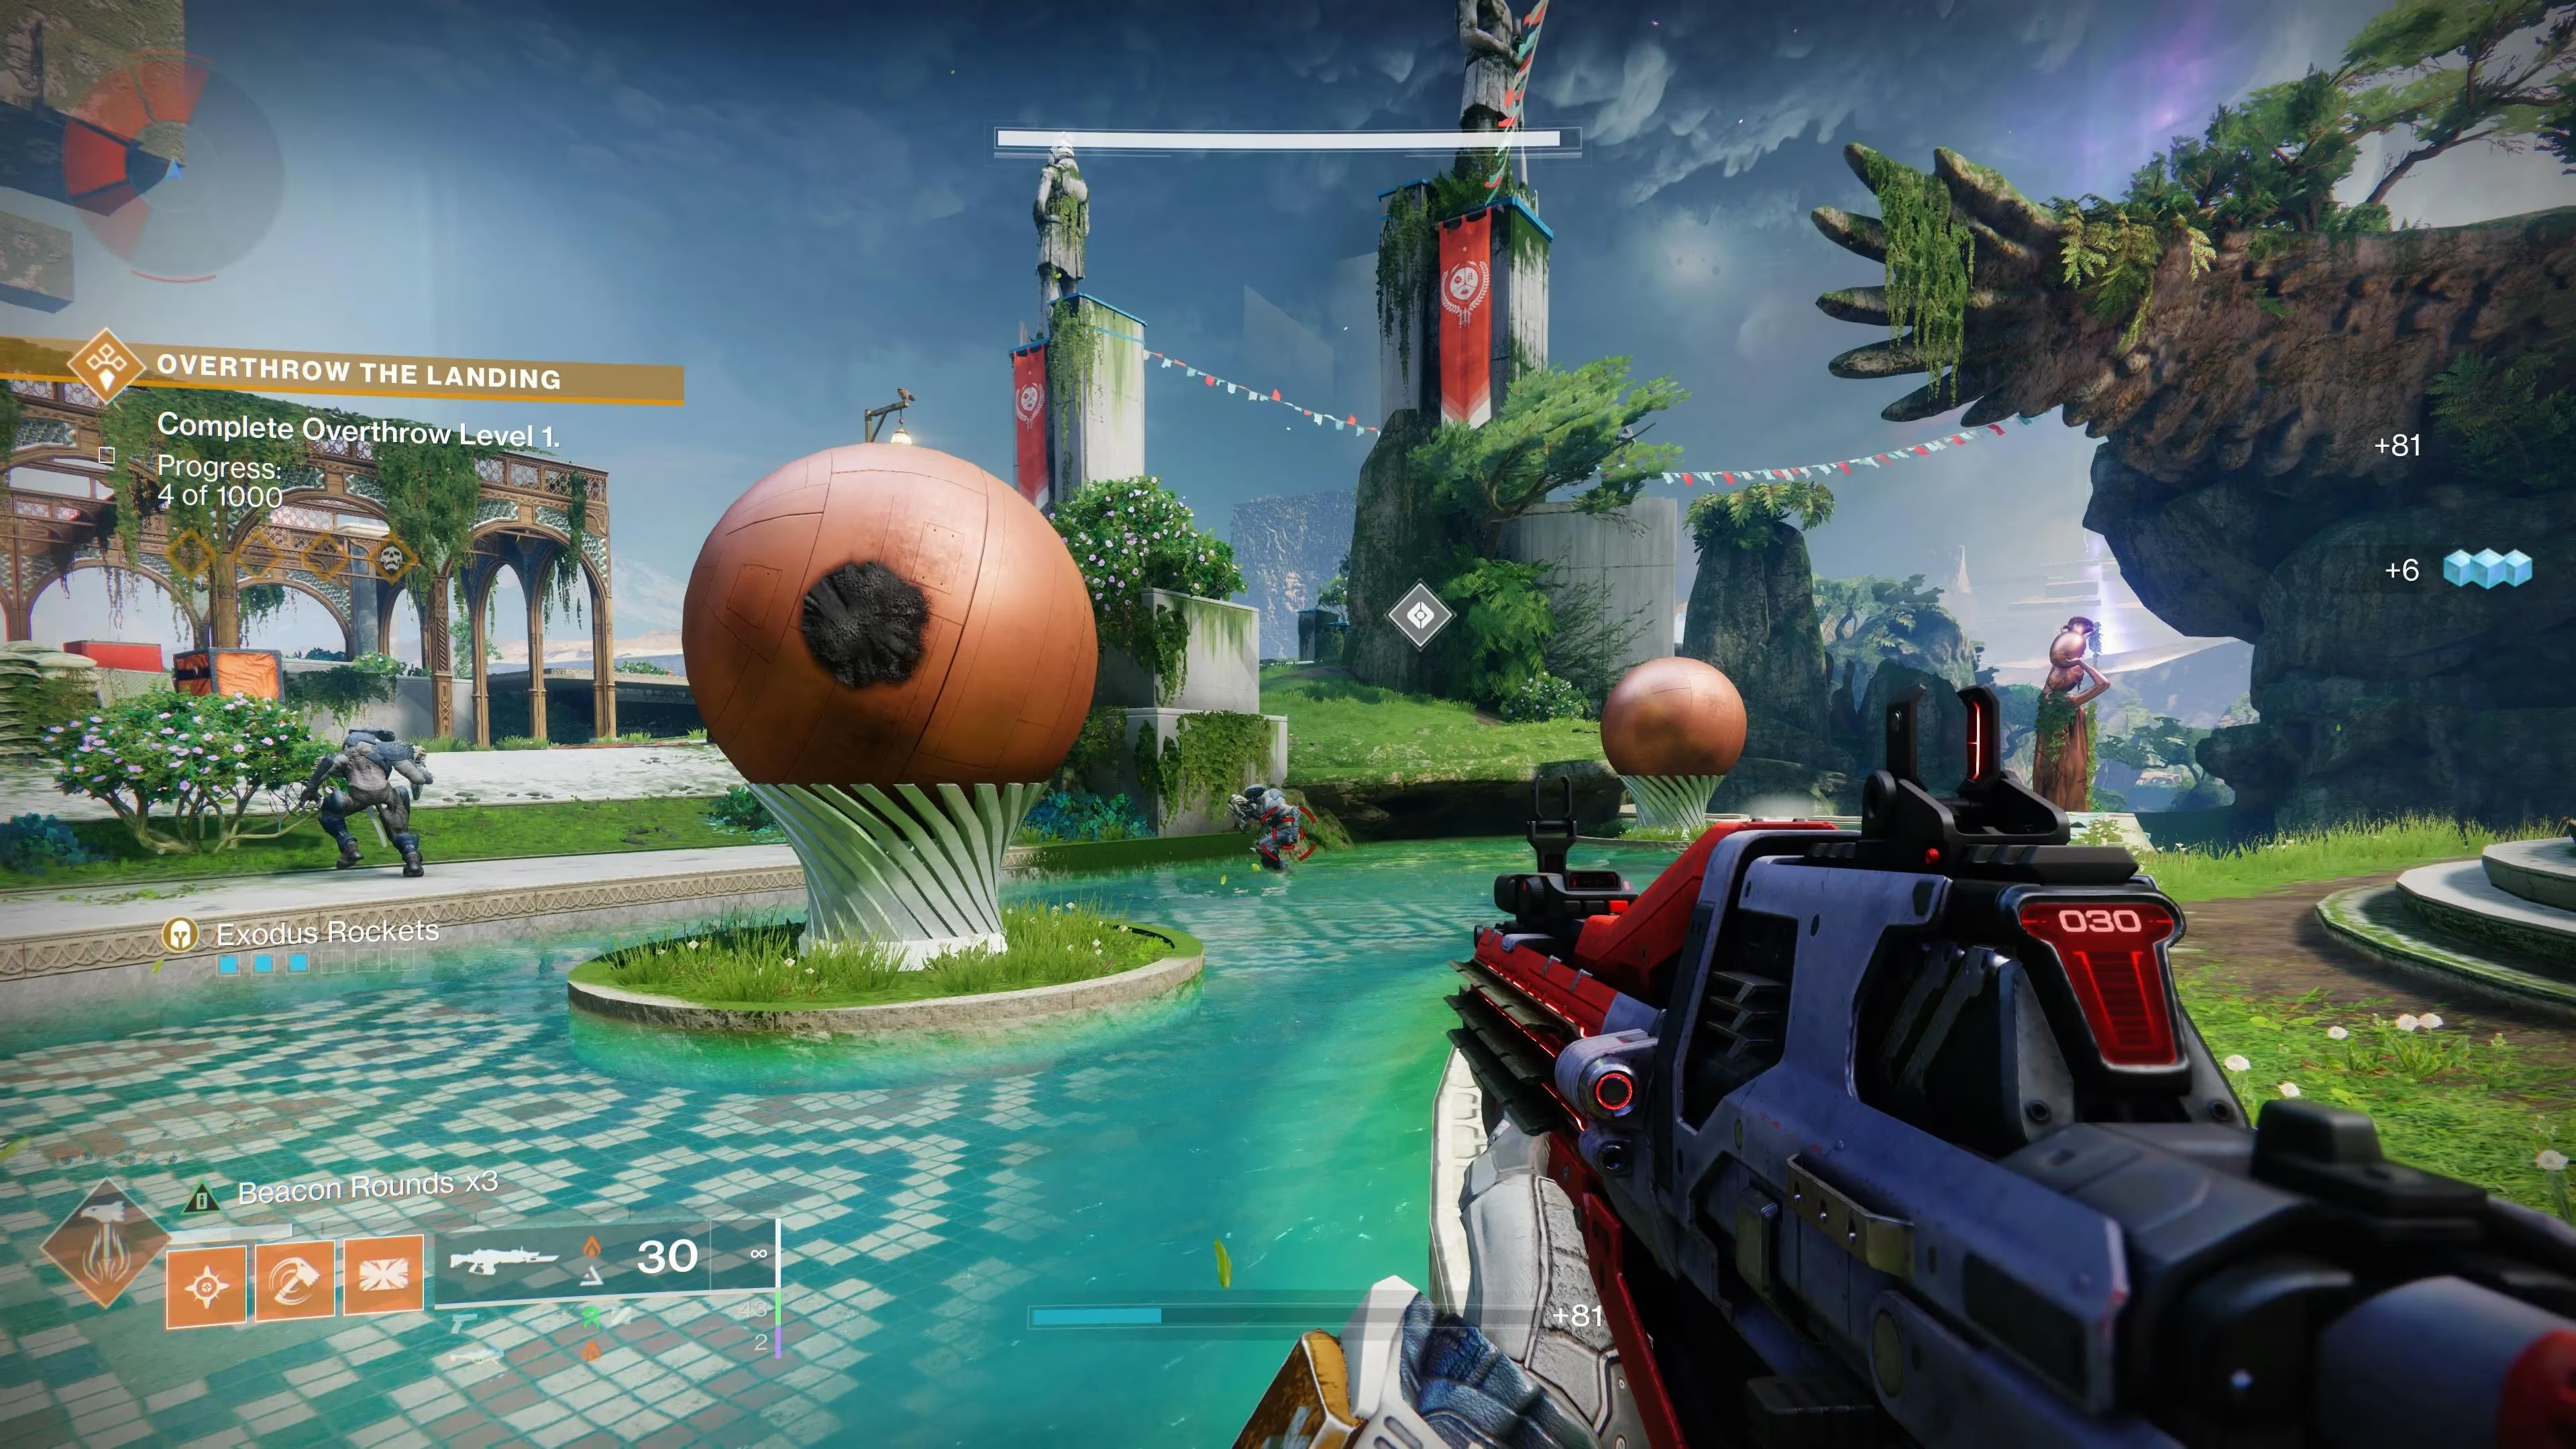
⚔️ Step 4: Convalescence: Greenery - Overthrow & The Sword Dance
Now, head to The Landing patrol zone. Your goal is to open Overthrow chests. Participate in Overthrow events, destroy Hive crystals and enemies to increase the event level, and open the chests that spawn. It shouldn't take too many.
The real challenge is the Cyst Trial: Sword Dance. North of The Refraction, you'll see the quest marker. Follow the eagle of light—it's a long parkour run that ends in a high cave (past where you found Ikora's ship). You'll find a door locked with Hive runes. Shoot the matching runes around the door to open it.
Inside, interact with the Hive Altar to summon a sword. Use this sword to destroy Hive-shielded enemies and crystals, following waypoints to more altars. Eventually, you'll reach an abyss with three Lucent Hive Lieutenants. Defeat all three, and use a finisher on their Hive Ghosts to prevent revives. After this epic fight, return to the Lost City, interact with the cracked Light and Ghost Shell, and finally, Micah's Conduit. Your reward? Embraced Identity (Red Border Sniper Rifle) and the final mission: Convalescence: Budding.
🏆 Step 5: The Final Gauntlet - Cooperative Focus Missions
This is it! Convalescence: Budding tasks you with completing three specific campaign missions on Cooperative Focus Mode:
-
Ascent
-
Dissent
-
Iconoclasm
To access this mode, look at your Pale Heart destinations map. In the bottom right, under 'Replyable Missions,' you'll see the three missions listed. DO NOT ATTEMPT THIS SOLO. These are as tough as Legendary campaign missions, with a Power cap of 2005 and brutal mechanics. Use Fireteam Finder, LFGs, or bring your most reliable friends.
Here are the mechanics you must master:
| Mechanic | What It Does | How to Counter |
|---|---|---|
| Fractured by the Witness | A random player gets a stacking debuff. At x7, movement is hindered. At x10, instant death. | Teammates must interact to take the debuff. Juggle it between all three players! |
| Berserkers | Getting close suppresses you. They have immune shields. | One player shoots the chest, another shoots the back simultaneously. After killing it, synchronize shots on the two Darkness Cruxes (orange glows). |
| Glyphtouched | One player can interact with Glyphs but can't see the symbols. | Communication is key! Call out where the Glyphtouched player needs to stand. |
Once you've conquered all three missions, return to Micah's Conduit one last time. Your perseverance will be instantly rewarded with the glorious Microcosm Exotic Heavy Trace Rifle!
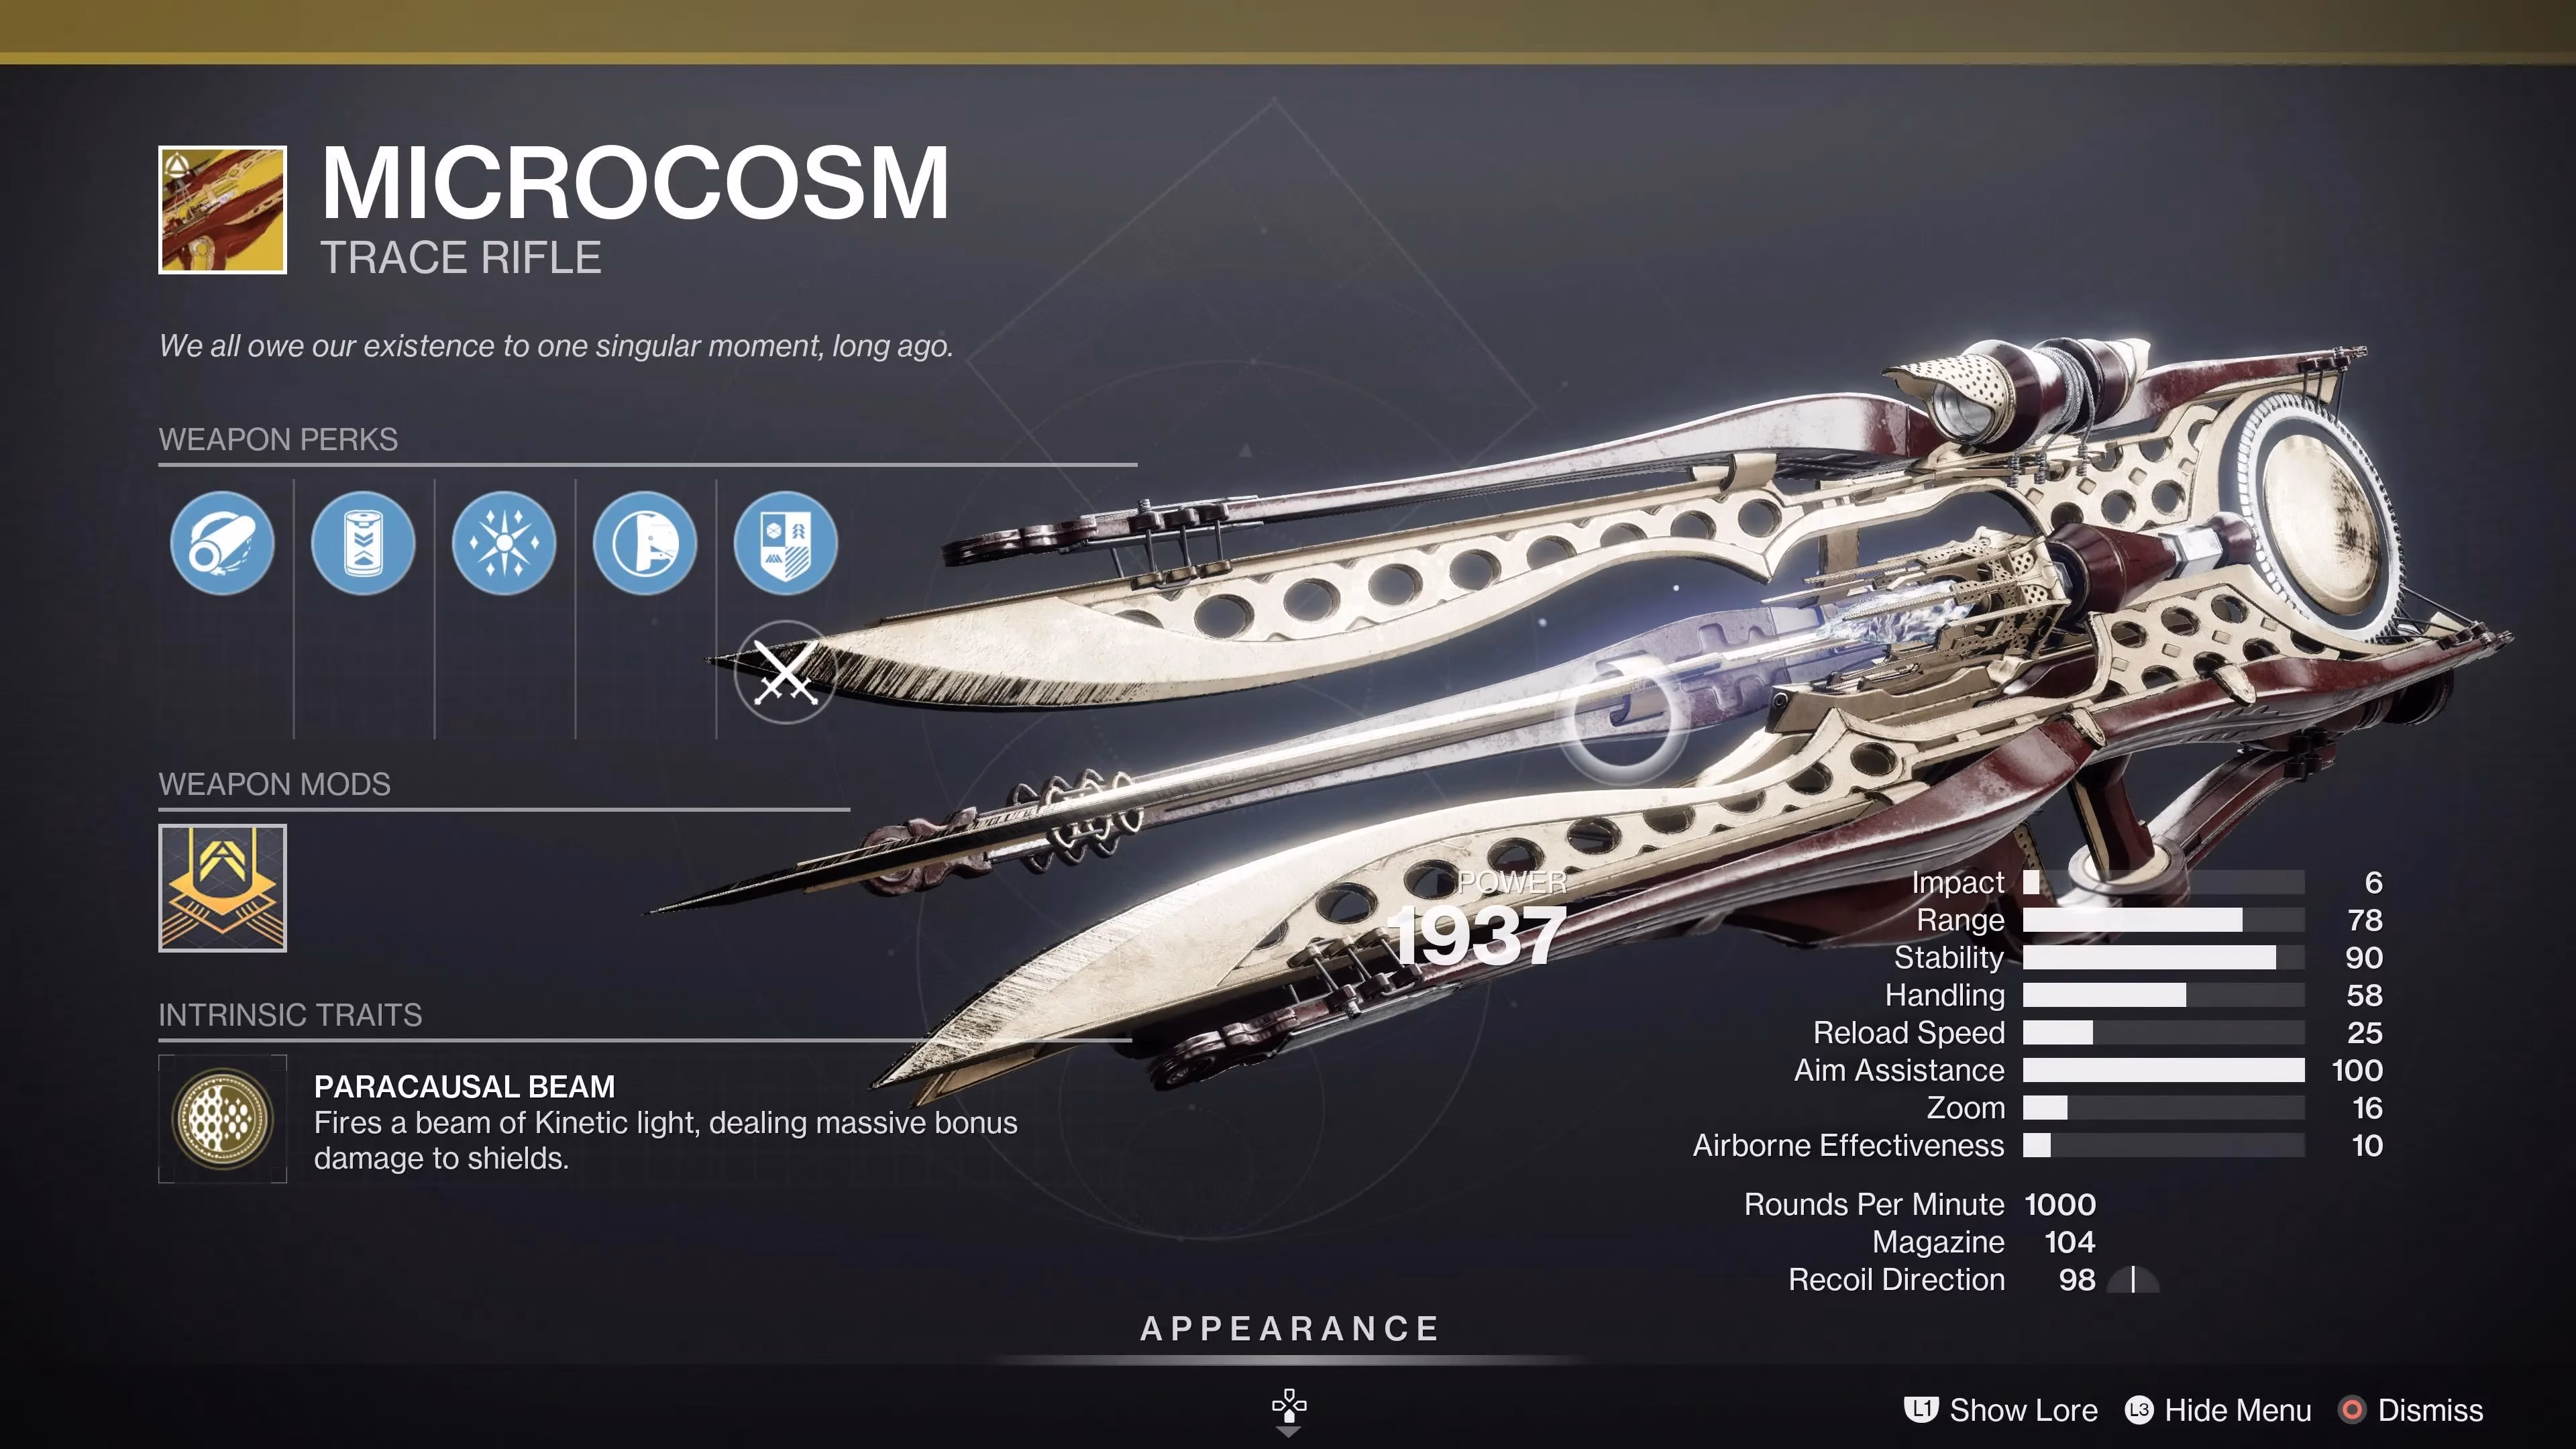
💥 Why Microcosm is Worth the Grind
So, after all that, what do you get? Let me break it down. Microcosm isn't about one-shot bursts; it's about sustained, building pressure. Its exotic perk lets you stack damage over time, making it phenomenal for clearing rooms of minor enemies or for unleashing your entire heavy ammo reserve during a Super for massive bonus damage.
The fact that it has no elemental affinity yet still shreds through shields makes it an incredibly flexible choice for endgame content like Nightfalls and Raids. Think of it as your go-to heavy for when you need consistent, adaptable crowd control and boss DPS support.
It's a long, challenging journey, fellow Guardians, but every step is worth it. Microcosm isn't just a weapon; it's a trophy that proves you've mastered the post-Final Shape challenges. Now get out there and start your Convalescence quests! What are you waiting for? That meta-changing firepower isn't going to earn itself. 😉
What's been the hardest part of your Exotic questing in The Final Shape? Let me know in the comments! 👇